turquoise

Monday, March 31, 2014

Quick & Easy Painted Projects!

I've been so inspired lately with Chalk Paint - decorative paint by Annie Sloan. Considering I sell it in the shop I work in I suppose it's no surprise! It's just so fun and easy! You can completely change the look of a piece in a matter of an afternoon! I love doing smaller projects because the change is almost immediate and you're done in an hour or two at most.  I've been working on the following projects for the last few weeks; playing around with colours, textures and techniques. I love this paint!

So here they are, little decorative items that got a facelift, a makeover, a new life - oftentimes because I had leftover paint from another project that I simply had to use up and it was the first surface my eyes lighted upon! ;-)

Cast Iron Candelabra:

I've had this candelabra for a few years, it was one of the first decor items I purchased for myself when I got my first apartment in the city. This thing could be a weapon! It weighs a TON! Dawn, in the Drawing Room, with the Cast Iron Candelabra! CLUE! 
Before
After
 It looks so fresh and pretty now with a dry-brushed coat of Pure White Chalk Paint. I intentionally left the brown iron finish showing in certain areas to highlight the relief of the design. A light coat of Clear Wax was applied to protect it and voila! New life!

Pretty Painted Keepsake Boxes:

When I was younger I was really into exotic Indian and Middle Eastern designs - lots of dark carved wood, Celtic symbols and mandalas... Well, I still love those designs, I just prefer the wood be painted instead of stained! These pretty keepsake boxes (complete with hinges and hand carved motifs) fell prey to my "Paint It White" phase (which I may still be suffering from actually...).

  
Keepsake Box Before
Keepsake Box After one coat of Cream Chalk Paint
This box was my first encounter of what is called "Bleed-Through" with Chalk Paint. Due to the porous nature of Chalk Paint, it can sometimes pull up the tannins in the wood - especially if a lower quality stain was used on the wood. No matter how many coats of Chalk Paint you apply, a brownish, yellowish or pinkish stain will continuously "bleed-through" the paint up onto the surface. Well, this is what happened with this box. A cheaper stain must have been used over in India when this was made; a pinkish stain kept coming up through to the surface. I didn't mind though, it allowed me to use Shellac for the first time and really see how it seals and essentially blocks off the stain from coming up through the paint. Typically two coats are needed but one seemed to be sufficient. There's always a solution with Chalk Paint! :-)

Smaller Keepsake Box Before
My new Keepsake Box in an Etsy photoshoot.
I had another keepsake box that I worked on at the same time as the larger one, luckily this one seemed to have been made differently (and better) because there was no bleed-through at all. I painted it Cream like the larger one, but I played with Dark Wax over a coat of Clear Wax. I love the rustic antiqued affect it gives!

Large & Small Keepsake Boxes

So romantic and so much more in keeping with my current style!
   
Beautiful Birdie Dishes:

I seem to have a thing for birds... and a thing for cast iron... because I have a little collection of cast iron bird dishes and mini birdbaths. They look sooooo good painted in pastel Chalk Paint colours.

  
Classic in Old White
 
A custom mix of 1/4 Olive and 3/4 Old White
Scandinavian Pink with a dash of Pure White to lighten it up.
I have so much more to show but I think I'll save them for another post! I hope you've enjoyed these little projects and I hope they've inspired you to give Chalk Paint a try! It truly is a miracle paint! So fun, so fast, so easy!

PS: Be sure to check out our Etsy Shoppe - more pretties are being added each week!

Until next time!

Love from,

The Gal at The Clever Cottage!

xox

Monday, March 24, 2014

Zen Bathroom Makeover!!!

So....

For the past several weeks I have been consumed with  "renovating" my ensuite bathroom - I say "renovating" in quotations because it really isn't renovating - because with a a new house, a wedding and grand honeymoon trip coming up in 6 months, who has the budget for "renovating"?! Let's call it "revamping"... I've been consumed with "revamping" my bathroom and am on a "paint it white" high, I have the Rolling Stones song "Paint it Black" in my head except I keep changing the words. "I see a wood chair and I want to paint it whi-ite!" 

Here's my inspiration! Photo from Pinterest
 
Being an interior designer (especially one with a penchant for the Victorian Shabby Chic look) I am particularly particular about colour. One aspect of our new home that pleased me (and there are many) was the colour the bedroom and ensuite bathroom were painted - a fresh spring green. Not too minty, not too limey, just right. *I just realized I'm the Goldie Locks of paint colour!

But along with the wall colour came the bathroom counter/cabinetry colour! An icky poo-brown (and shiny to boot!) painted on freestanding cabinets that looked more like they were intended for files than toiletries!

Here's the Before:

It all started with those pooey cabinets...
Now I wish I could say I "staged" it to look this horrible but I confess, I was so disparaged by the ickyness of those cabinets that I didn't pay my attention to order and design... I actually love that little rug though (an amazing find down in Vermont years back) but it wasn't right for the bathroom. This place needed to be a haven, a zen-like retreat... it needed to be painted white!

Now here's the After:

I can breathe again!
Much better n'est ce pas? The fresh green colour really plays well and is accented beautifully with the primarily white furnishings. You'll notice the vertical picture frame on the wall to the right was also given a makeover with "Old White" Chalk Paint TM by Annie Sloan. Look closely into the mirrored wall reflection... see the white painted wall cabinet? That is my piéce de résistance (see below):

Before:

Beautiful stained pine wood cabinet made by my future father-in-lay (he makes lovely pieces)
After:
Shabbified for a new look!
I love how the collectibles inside are now beautifully highlighted! I painted the interior, trims and hardware in Country Grey (one of my favourite Annie Sloan colours). The best part is the handles on the sink cabinets are also painted in Country Grey - did someone say "fabulous"?!

Poopie Cabinet Before
Fabulous Shabby Chic Cabinet After!

In addition to the bigger pieces, I knew the little accent pieces were just as important (if not vital) to contributing to the Zen Factor of this bathroom. It wouldn't do any good for me to have these white cabinets if everything else was still a jumble of colours and patterns. So I took my paintbrush to a cute little wooden shelf I keep next to the bathtub for soaps and bubble bath bottles...

  
Cute Collapsible Wrack Before
Sweet Shabby Shelf After!
To change things up (and because I had run out of Old White) I used Pure White Chalk Paint on this shelf but I personally find Pure White a little too white, a little too hard on the eyes, so I rustiqued (I think I just made up a word there) I rustiqued it up by brushing on some dark wax over the clear to give it some patina.

Finally, I had this amazing pair of pillar candle holders from Homesense that I also use around the tub. The wood on them was beautiful but I knew they'd be even more gorgeous fitting into the "Paint It White" mantra!


Exotic and a little out of place Before...
Fresh, clean and elegant After.
You'll notice I did very little (if any) distressing on these pieces, the reason for this being that the picture frames already have an antiqued look and I wanted this bathroom to look fresh and new and clean and as sleek as possible. I wanted to play with texture and showcase the contrast between distressed and smooth. I am delighted by the results!


Light and bright and Zen
My big oval tub with all my goodies around!
Believe it or not this project has been ongoing for a couple of weeks, only because I kept procrastinating on completing the painting (a project here and there in the evenings after work), The truth is it really could have been completed in a week max because THAT'S how fast Chalk Paint works!

I hope you all find your bit of Zen today!

Love,

Dawn

xox

Thursday, March 13, 2014

I think I can, I think I can, I think I canvas...?


And I'm gonna need it!

A quickeroo post today - soooo busy with many things going on at once! Between Chalk Painting projects at work and Chalk Painting Projects at home, and Chalk Painting projects for my shop (yes MY SHOP!!!) and blogging and and thrifting and antiquing and crafting and wedding planning and and and.... Ah! *deep breath* I love my life! ;-)

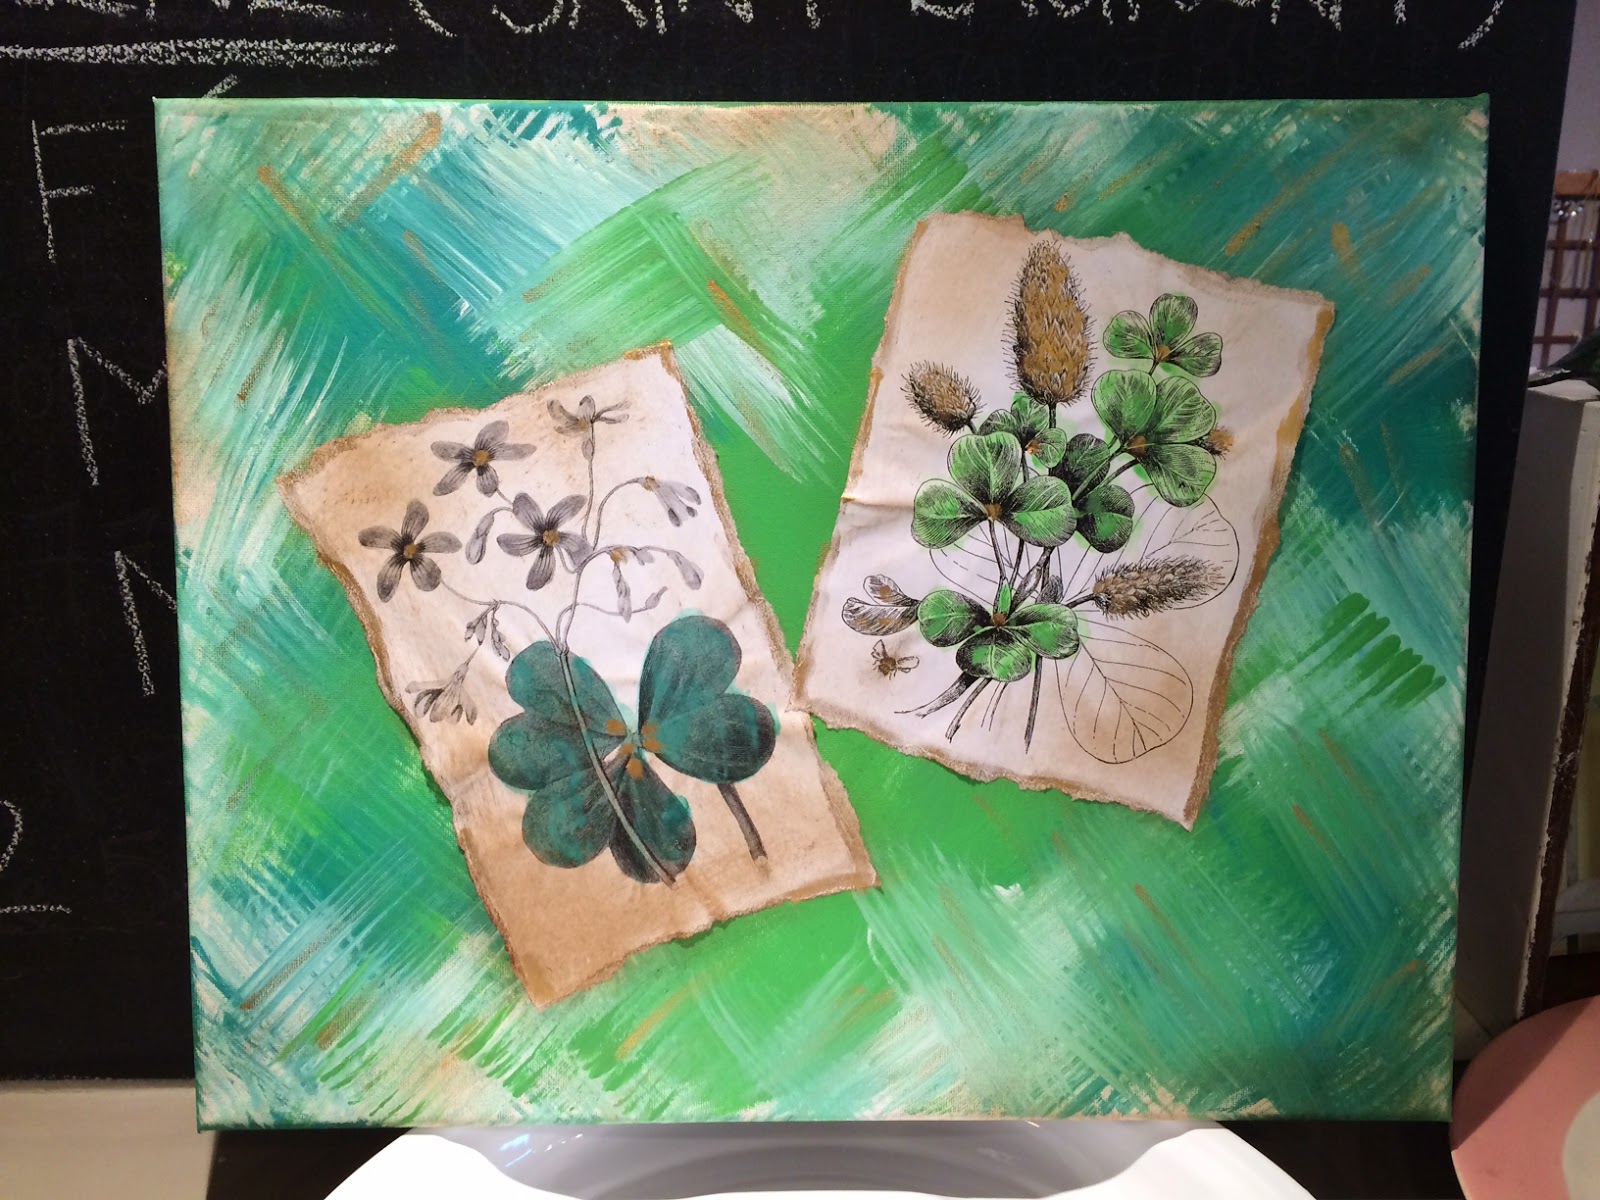
Here are my latest creations with Chalk Paint - painted canvas! Yeah, who'd ever think of painting canvas with (of all things) - PAINT!?!?! The nerve! Well, this chicky, that's who! These canvases were created as not only artwork but as a window display for the shop I work at - Piorra Maison in Pointe Claire Village, Quebec.

I used simple paper print-outs of inspiring words and photocopies of old botany and biology images (in this case moths) and glued them to the painted canvas (which had been painted with Antibes Green and Florence Chalk Paint by Annie Sloan). Once glued in place I waxed over top with Clear and Dark wax to give a nice patina and then highlighted some areas in gold gilding wax.

These were all created for a St-Patrick's themed window display (as you can tell) - hence the green and gold!


Here's the finished product - everything green and spring-timey!
My two latest creations are more spring-inspired than St-Patty's (and consequently my favourites from the bunch so far! I want to keep them!)

The Original 'Tweet"
I created the colour on my birdie one by mixing 1/4 Florence with 3/4 Cream - it created this stunning sea sky blue.

Lastly I used the classic 'Crackle" technique on a canvas and waxed it up to look authentic and old - it now looks like an aged oil canvas painting from some sub basement in Renaissance Italy! I free-hand cursive wrote 'Vintage' just for fun.

And there you have it, oozing creativity from everywhere and I love it!

By the by, the big news iiiiiissss....

OUR ETSY SHOP IS NOW OPEN FOR BUSINESS!!!! YAY!!!!!

Please visit our shop HERE

For now there is a selection of my hand-made jewellery, pieces inspired by the ones featured in a previous blog post I did, which you can read here.

I have many goodies to list; hand made crafts, vintage finds and much more! I will be working on shipping to the US and on accepting different modes of payment (for now it's only PayPal).

Thank you all so much for your support! It took me long enough to get my act together but now I truly feel in a position to hit the ground running and really enjoy this endeavour!

Don't forget to Like The Clever Cottage on Facebook

I think I can, I think I can, I think I can... and you can too!

Love from,

The gal at The Clever Cottage!

xox